
In this guide, we’ll walk you through automating the process of creating a ticket in HubSpot when logging a call outcome from the Kixie dialer. This process involves using Zapier to connect Kixie and HubSpot through webhooks, leveraging HubSpot’s API to ensure a seamless experience. Follow along as we break down each step, providing all the details you need to set this up.
Step 1: Setting Up HubSpot Call Outcomes
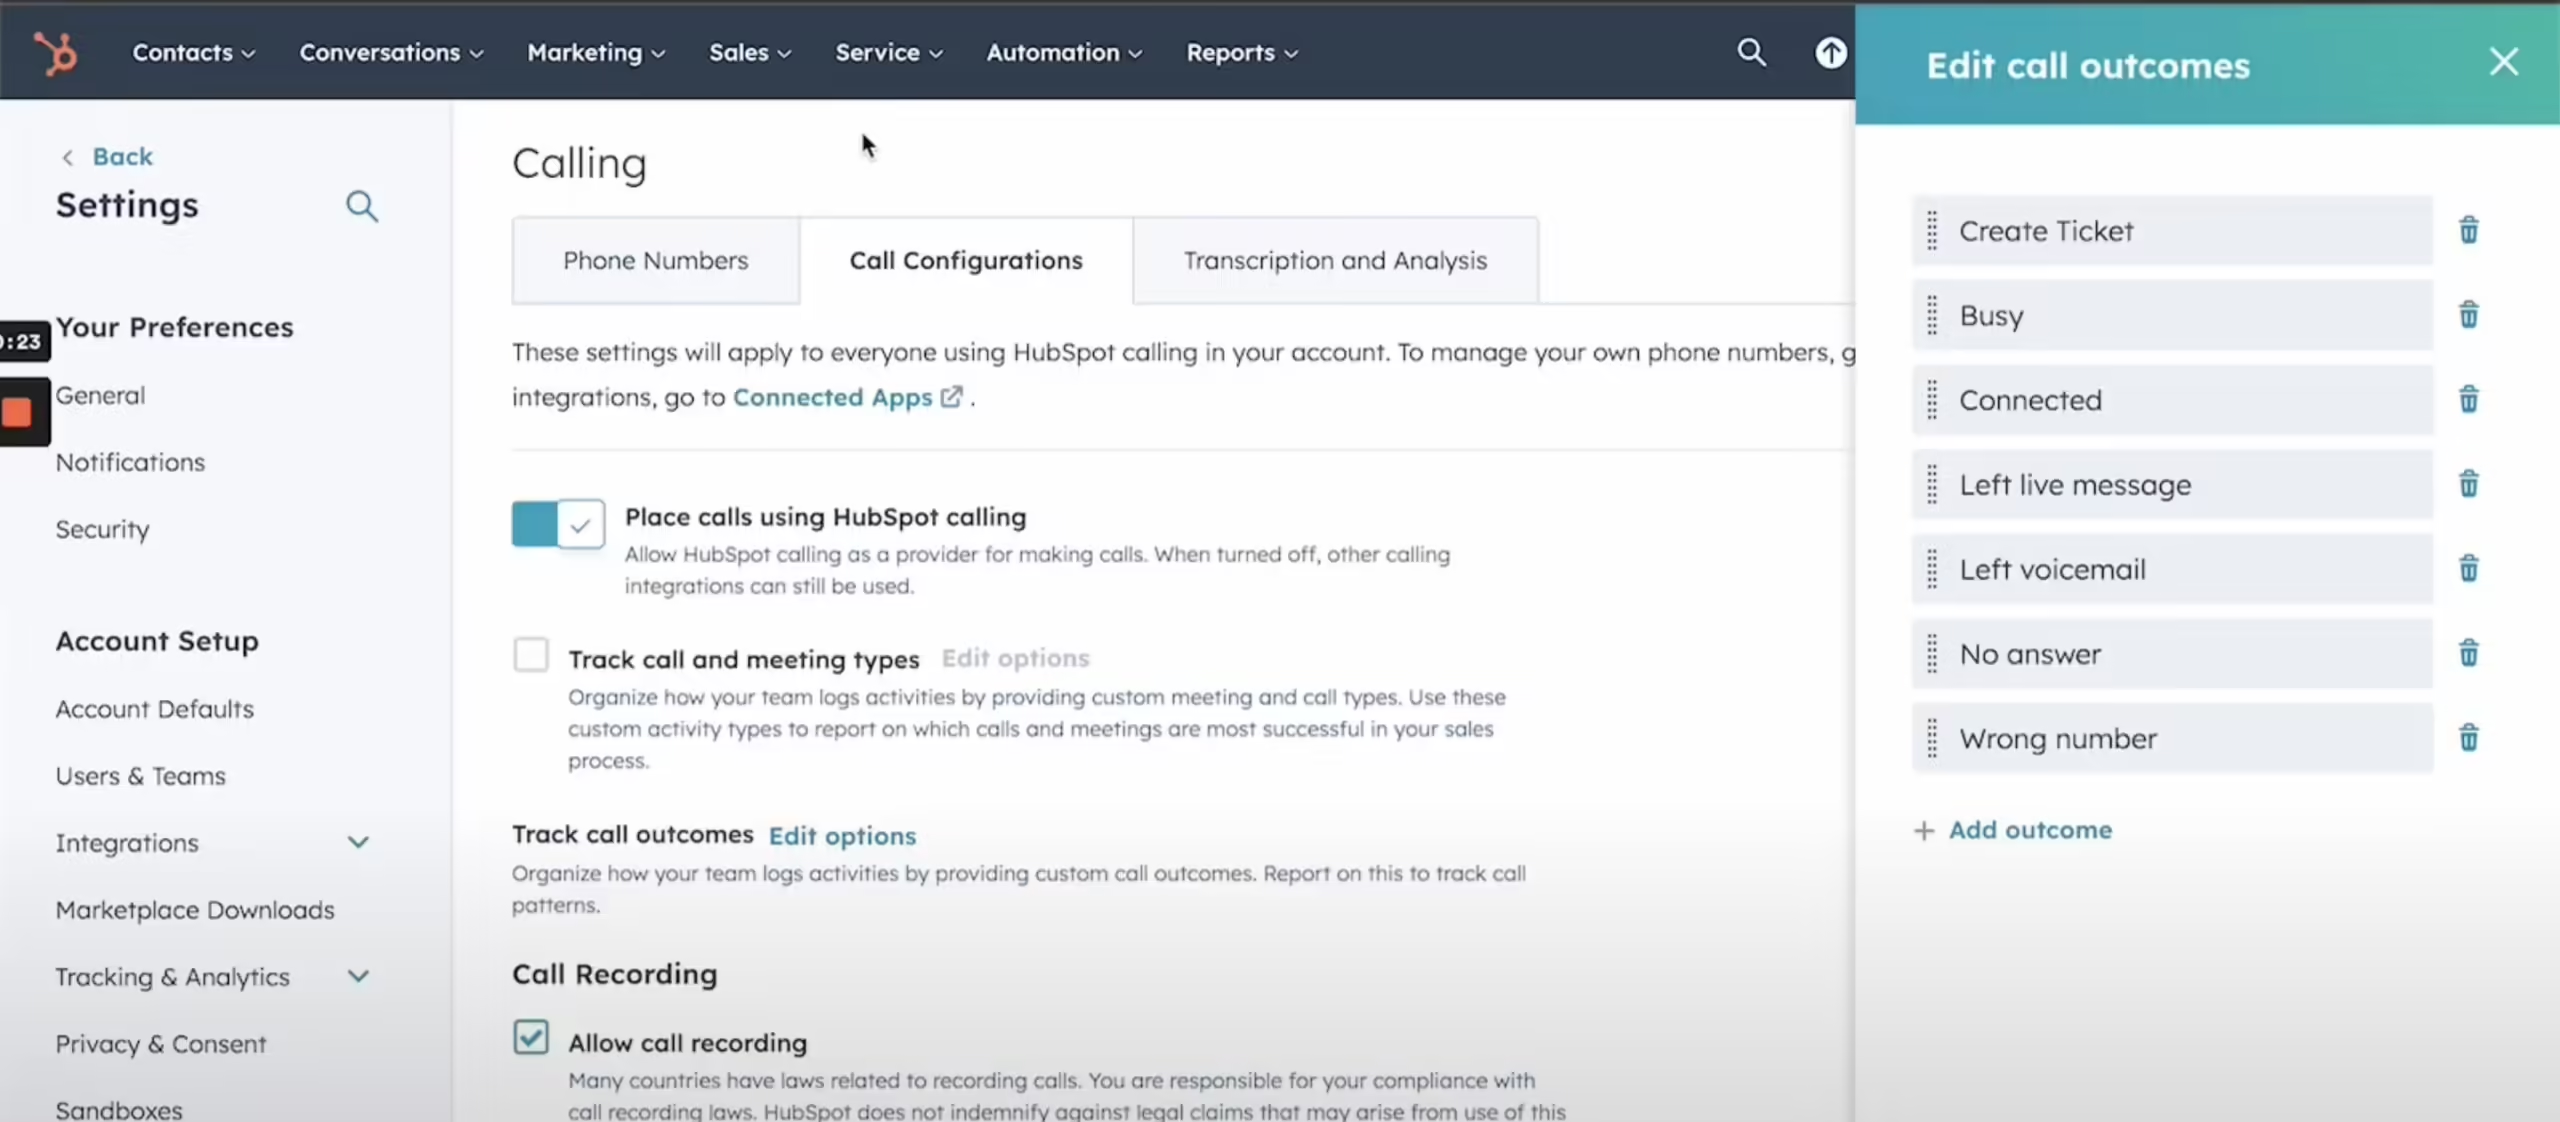
The first step is to create a list of call outcomes inside HubSpot. These outcomes will be available in the Kixie dialer for selection.
- Navigate to HubSpot Settings: Go to the “Calling” section under settings.
- Create Call Outcomes: Define outcomes like “Create Ticket” to ensure that the correct actions are triggered when a call outcome is logged.
- Reflection in Kixie: Once set up, your outcomes will appear in the Kixie dialer, ready for selection.
Step 2: Configuring Webhooks in the Kixie Dashboard
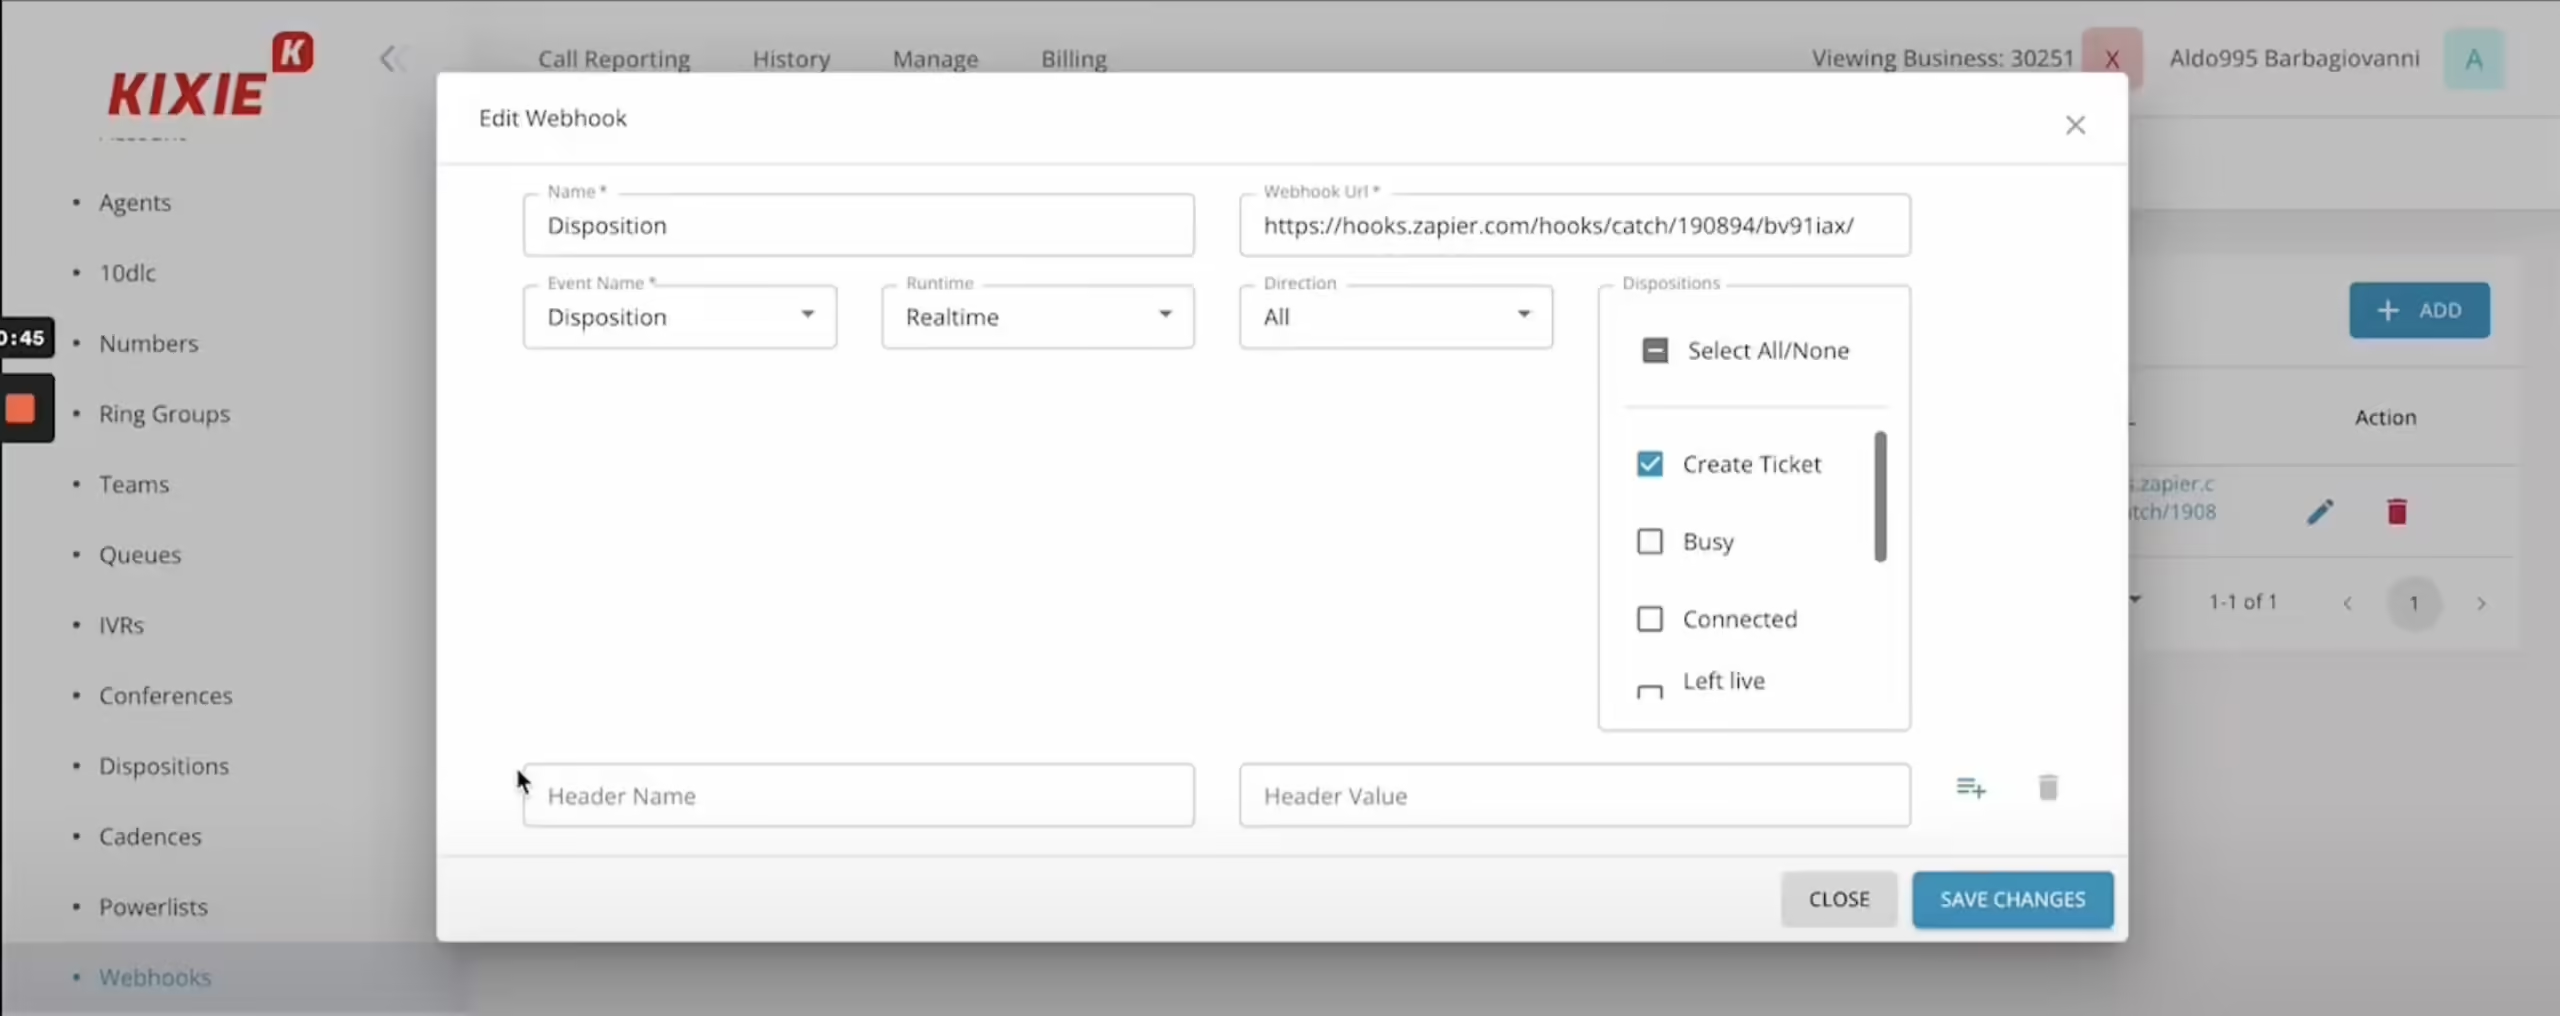
Next, we’ll configure a webhook in the Kixie dashboard that triggers upon logging a call outcome.
- Select ‘Disposition’ as the Event: This ensures that the webhook is triggered when a call outcome is logged.
- Filter Call Outcomes: For this example, select “Create Ticket” as the outcome that triggers the webhook.
- Webhook Data: The webhook will include information like the call ID, contact ID, disposition, and more, providing everything needed to create the ticket.
Step 3: Creating a Zapier Zap for Automation
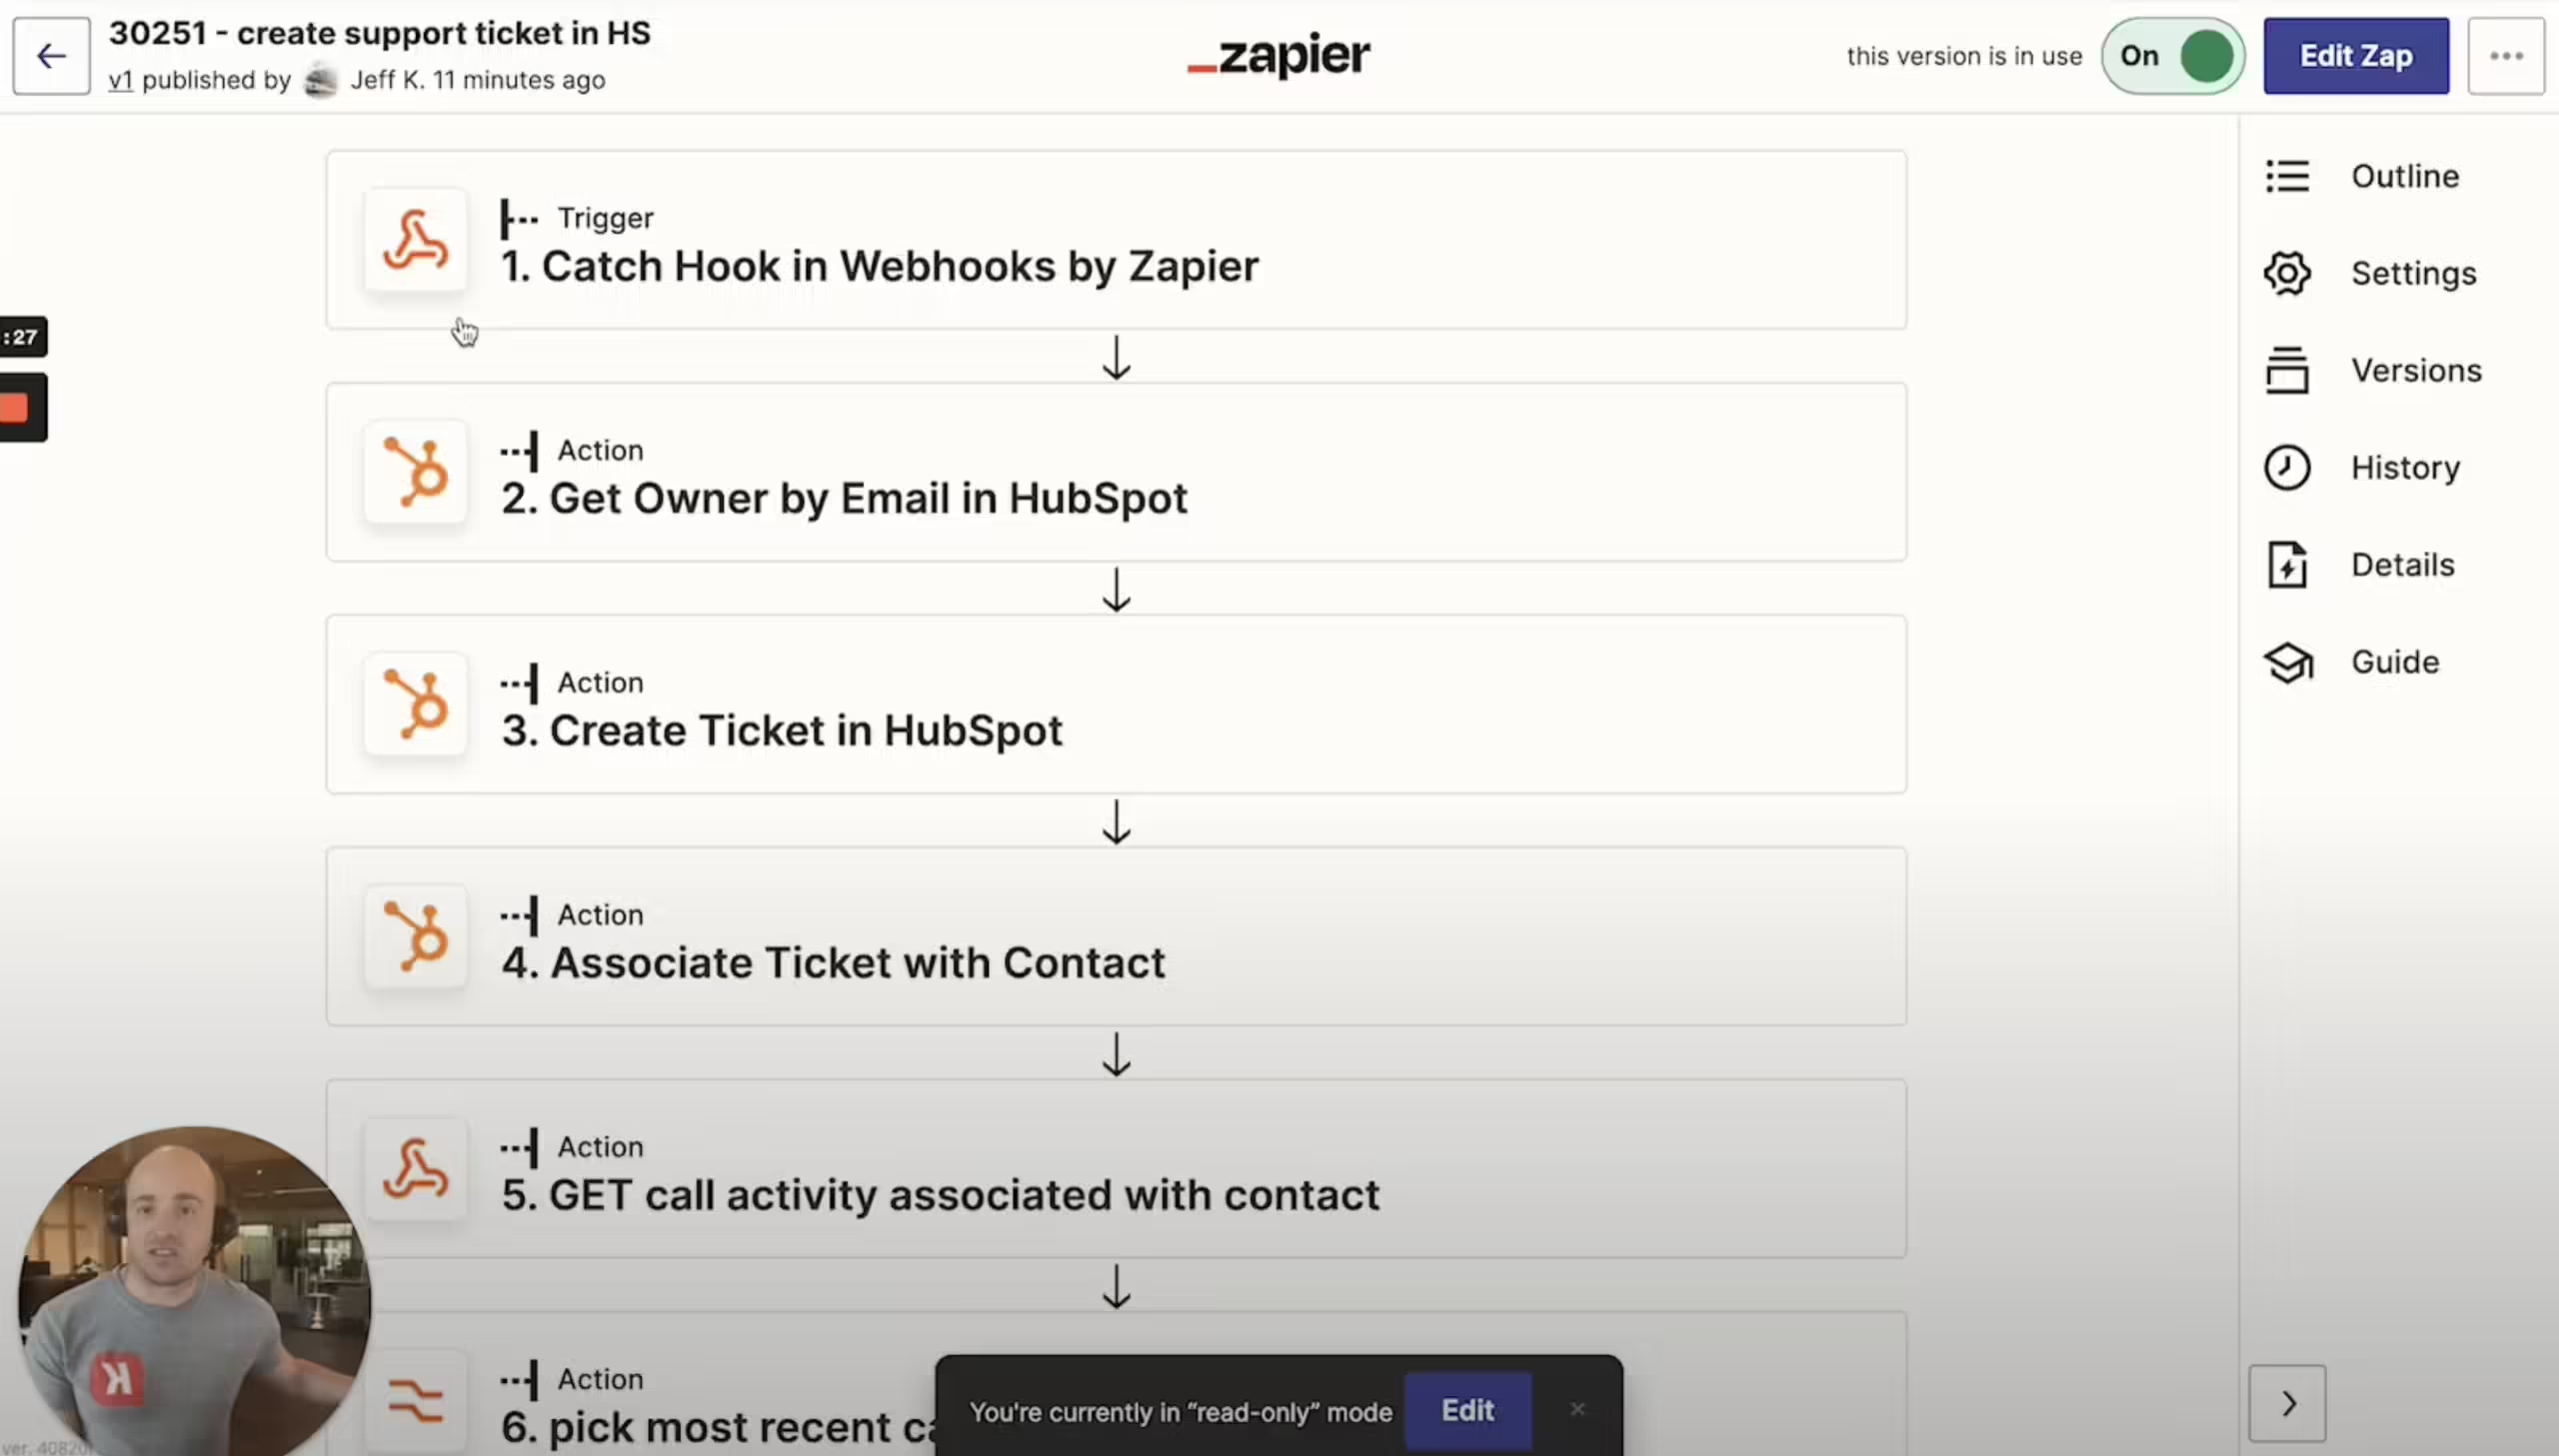
We’ll use Zapier to automate the process of creating a HubSpot ticket whenever a call outcome is logged.
- Set Up a Webhook Trigger: In Zapier, create a new Zap and use “Webhooks by Zapier” as the trigger. Connect this to the endpoint provided by the Kixie webhook.
- Retrieve the HubSpot User ID: Use the email address of the Kixie user to find the corresponding HubSpot owner ID.
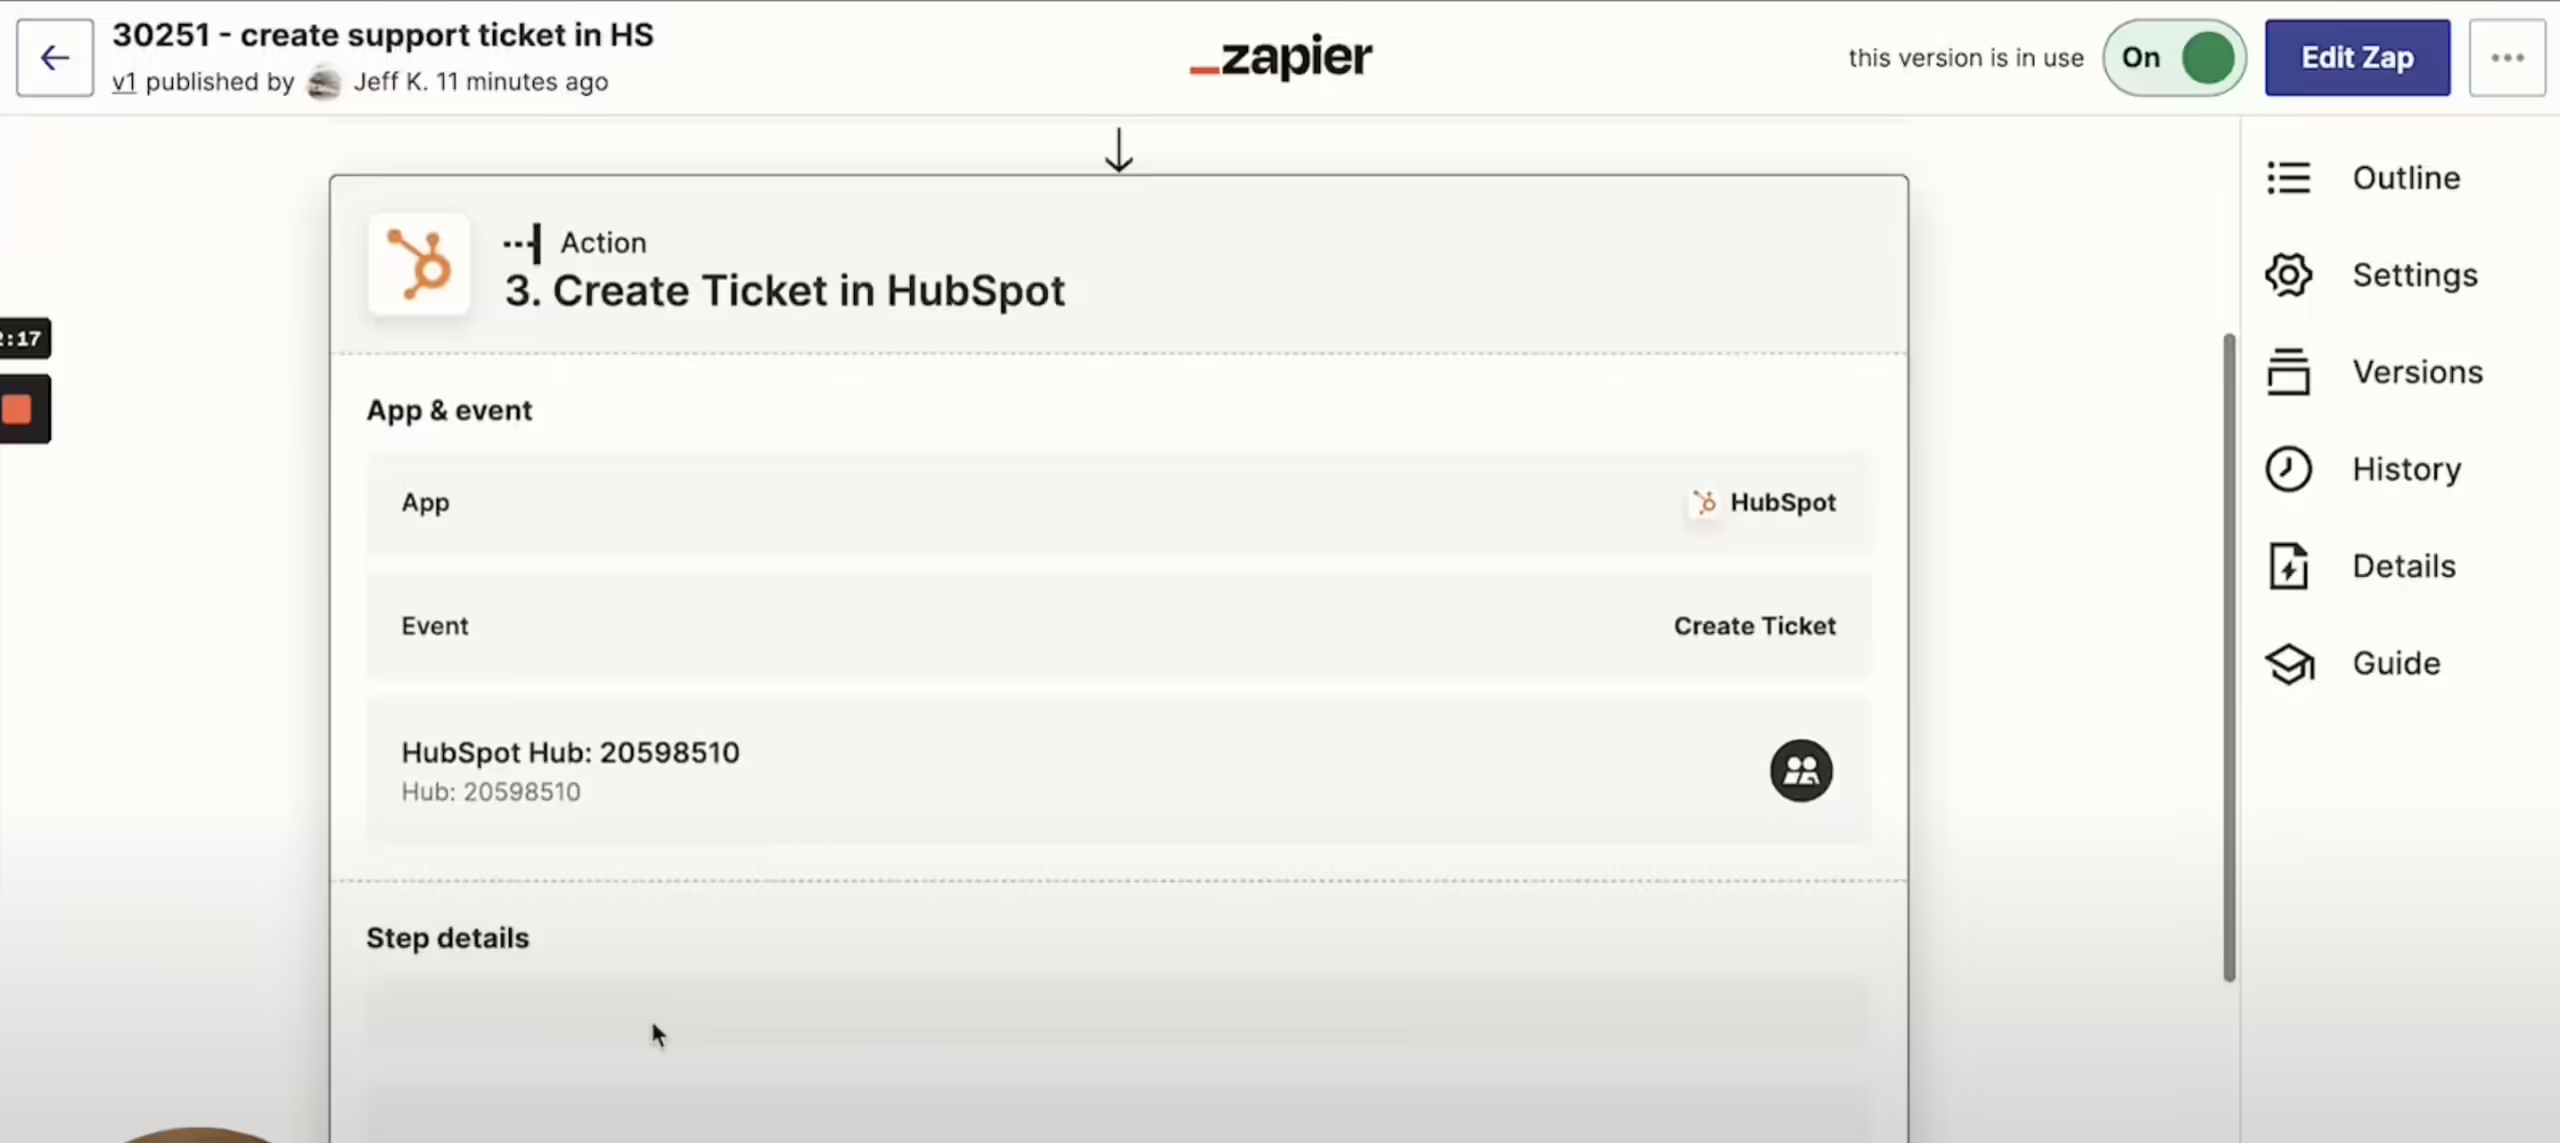
- Create a HubSpot Ticket: Use the “Create Ticket” action in Zapier, ensuring that the ticket is assigned to the right user based on the email address.
Step 4: Customizing the Ticket in HubSpot
Make sure that your ticket contains all the necessary information for your team.
- Include Call Details: Use webhook data to include information like the call direction, status (e.g., missed call), and the involved phone numbers.
- Assign Ticket Ownership: Assign the ticket to the Kixie user who logged the outcome, ensuring they are listed as the owner or creator.
- Choose Pipeline and Stage: Determine which pipeline and stage the ticket should enter based on your needs.
Step 5: Associating the Ticket with HubSpot Contacts and Calls
To ensure that the ticket is fully integrated with your HubSpot contact records, follow these steps:
- Link the Ticket to the Contact: Use the HubSpot contact ID provided in the webhook data to associate the ticket with the corresponding contact.
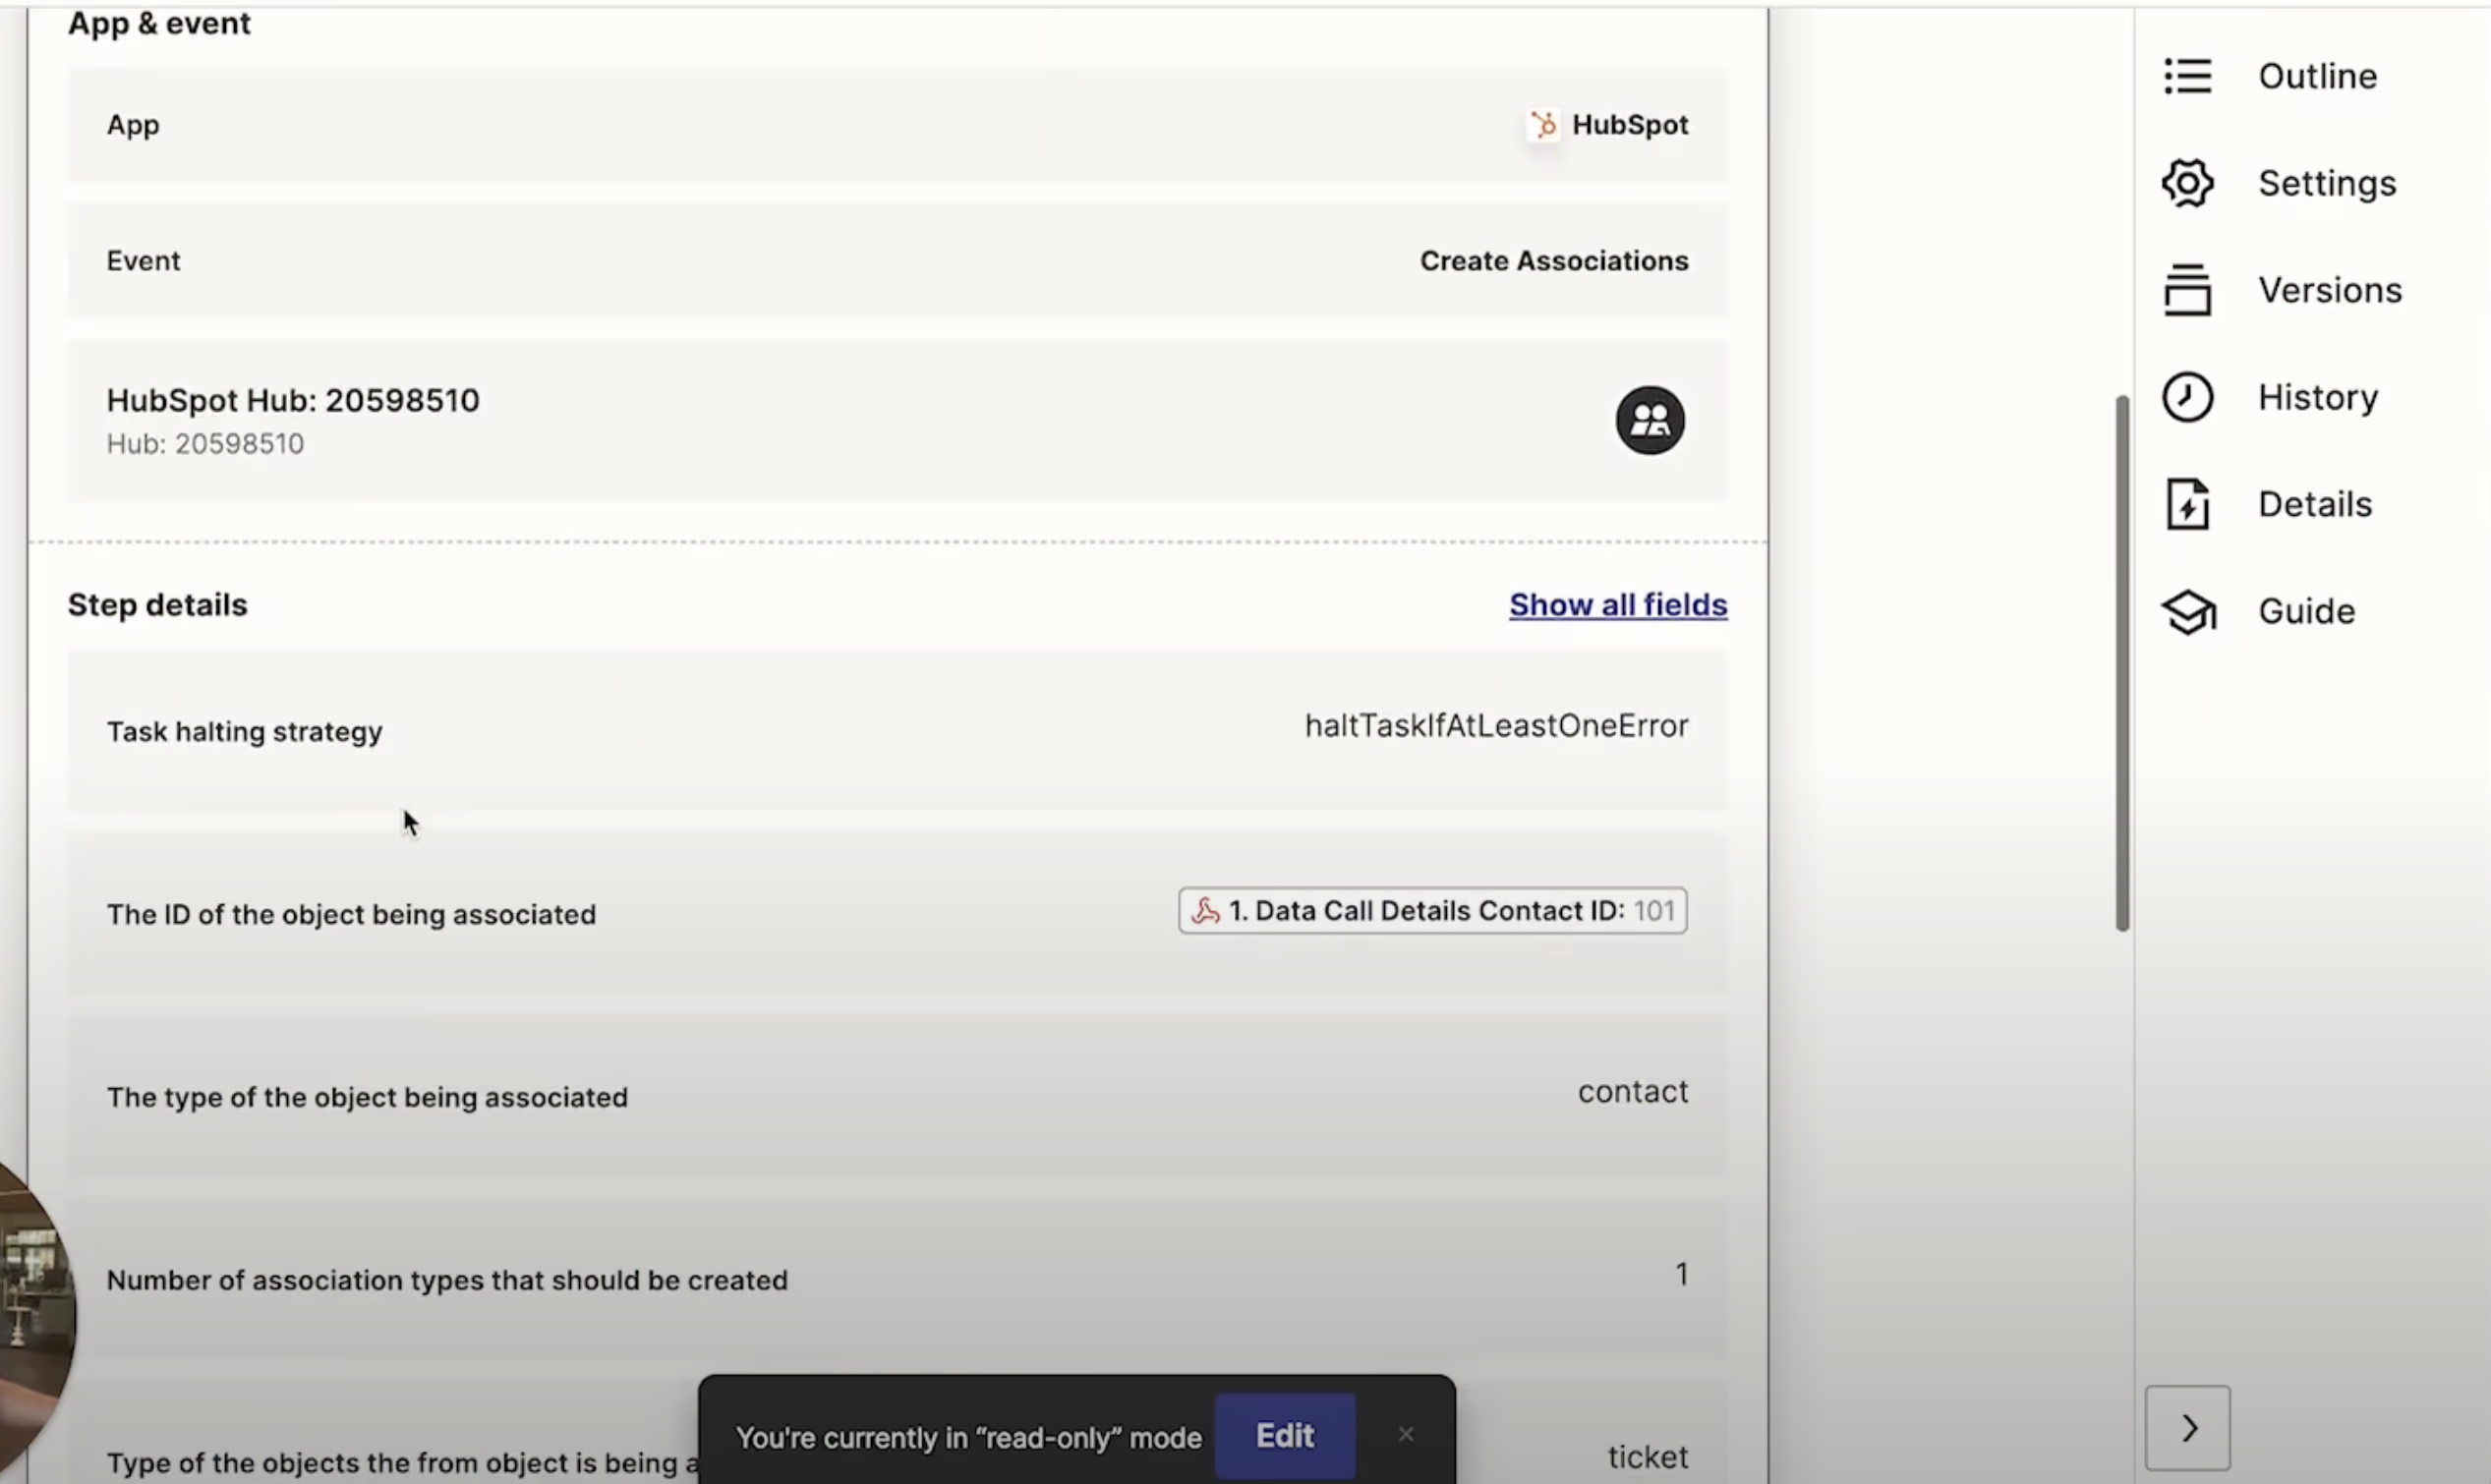
- Connect Call Records to the Ticket: Using the HubSpot API, retrieve the most recent call activity associated with the contact and link it to the ticket.
- Update the Ticket with Call Data: Use a PUT request in Zapier to update the ticket, associating the call activity ID with the ticket.
Step 6: Reviewing the Automation in HubSpot
Once everything is set up, review how the automation works in HubSpot:
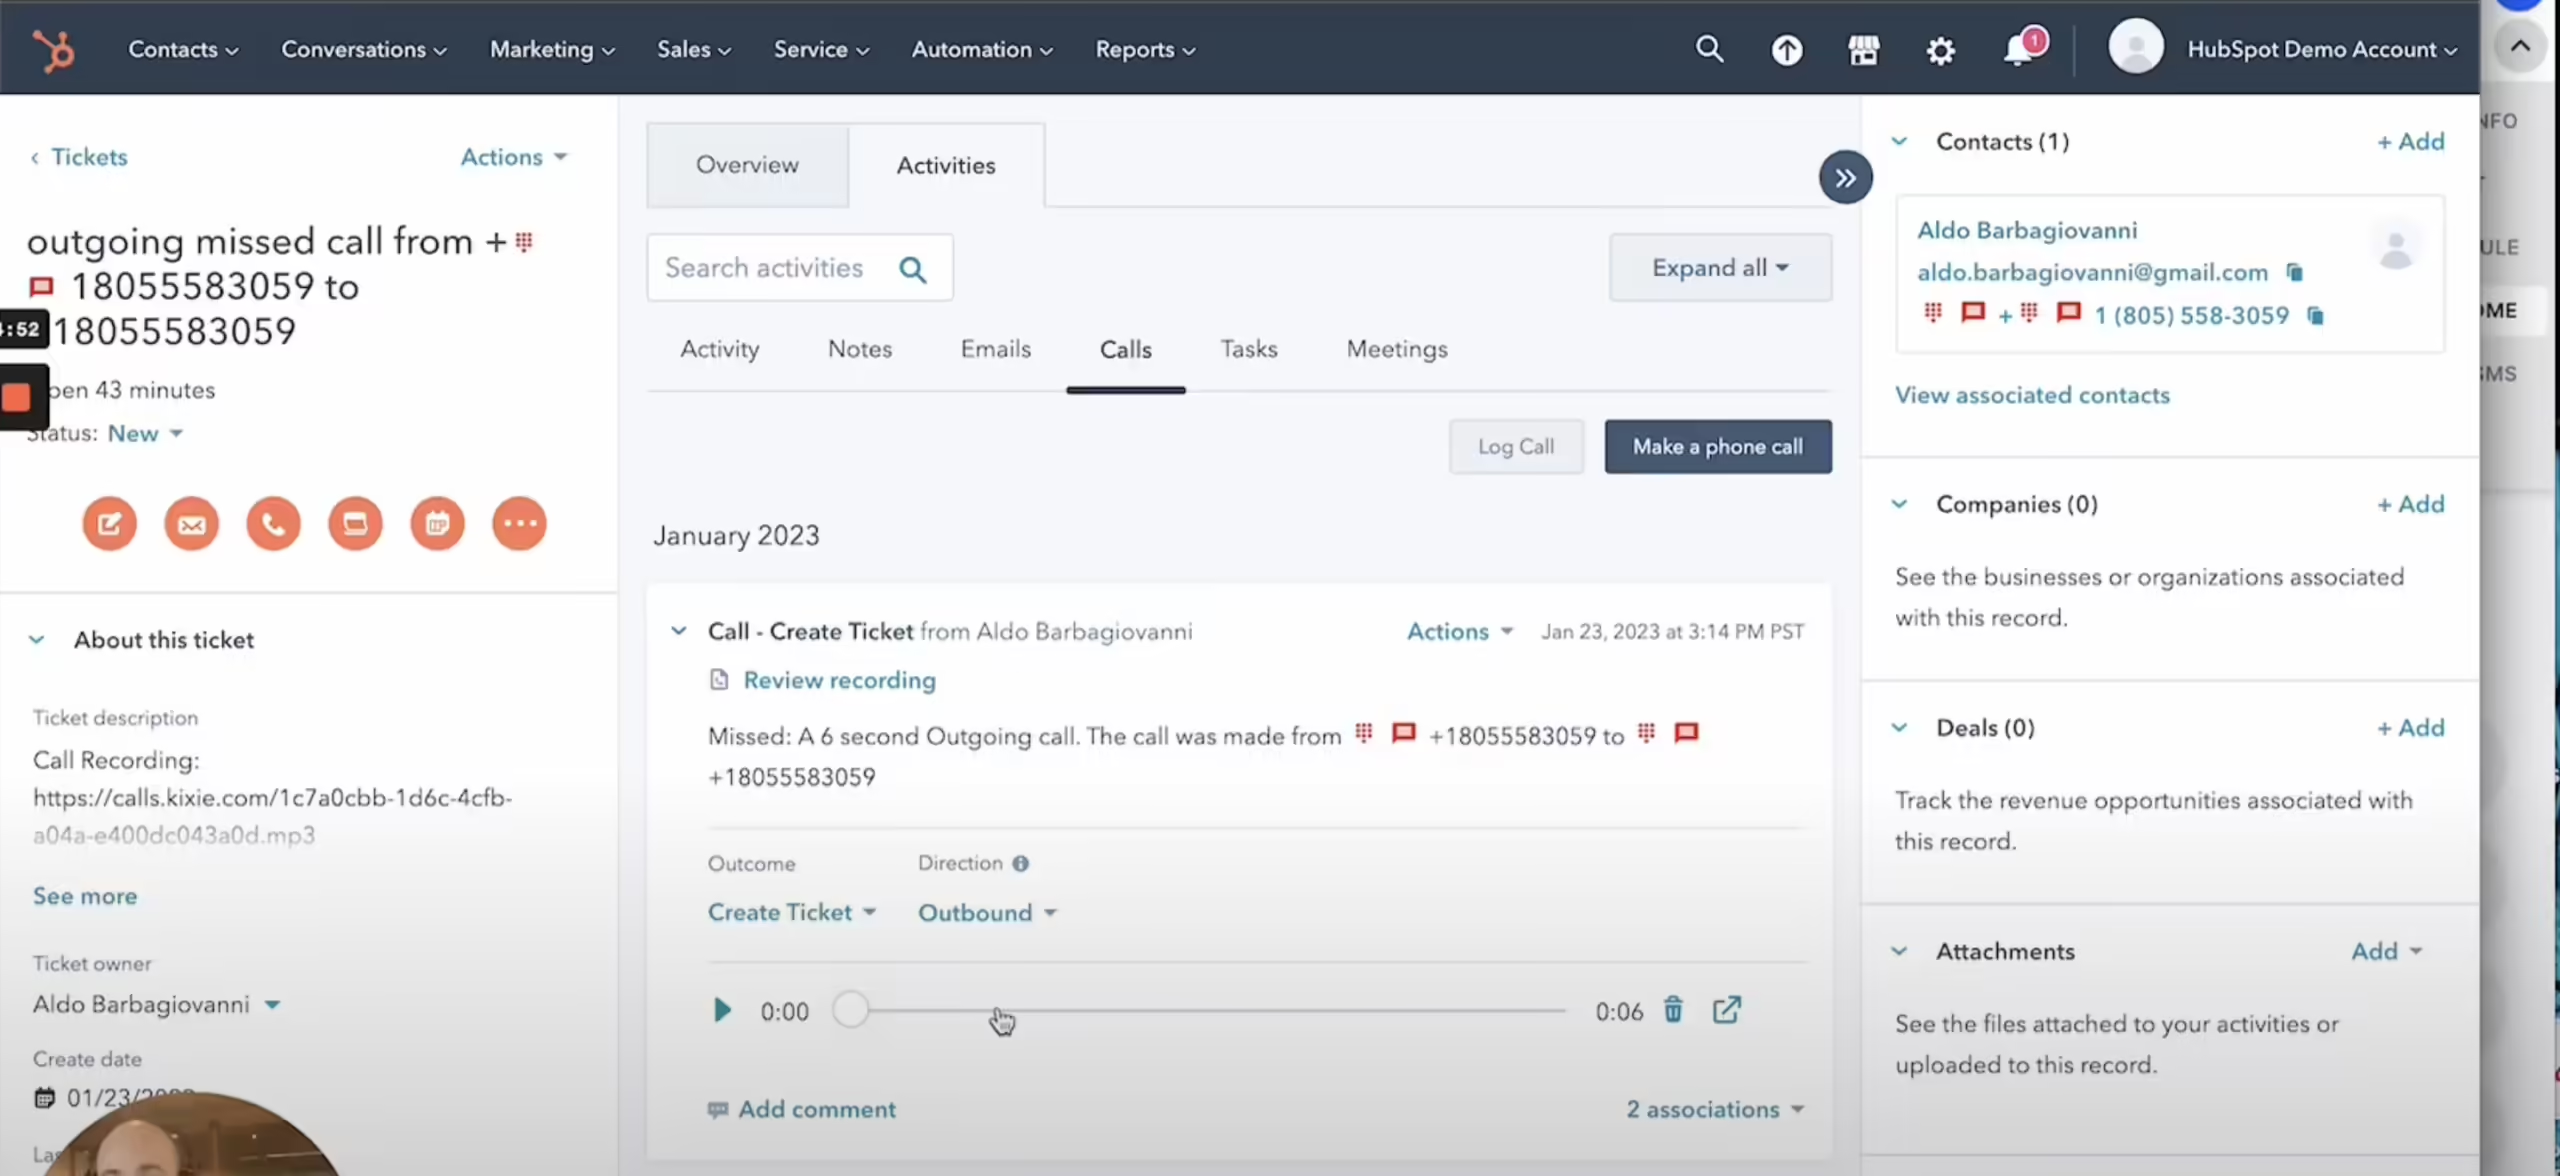
- View the Ticket and Associated Records: Go to a ticket in HubSpot and check the “Associated Activities” to see the logged call and contact information.
- Adjust as Needed: Fine-tune your Zap or webhook settings if needed to better align with your process.
Tips for Using Zapier and HubSpot API
- Handling API Calls: Use Zapier’s built-in formatter to select the most recent call activity from a list of call IDs.
- Authorization and API Tokens: Remember to rotate your API tokens regularly for security purposes.
- Using HubSpot’s API Documentation: Familiarize yourself with HubSpot’s API documentation for more advanced customizations.
